
We’ve had to rebuild our chimney. It took a long time to find and appoint the right builders and roofers, but we’re extremely pleased with the way it turned out. This is our story of rebuilding a period chimney on our Victorian property.
Since we live in a period farmhouse that used to service one of the most prestigious halls in the area in the mid-19th century, we wanted to ensure that the chimney rebuild was in keeping with the rest of the house.
It wasn’t an easy task (it never is), but we finally found and contracted a company that specialises in roof and chimney restorations and rebuilds for English Heritage on period properties.
In our video, we focus on how bad DIY can damage your old, ailing chimney, and most importantly how a period chimney should be rebuilt using modern building techniques while retaining its heritage and charm.

Bonus video footage: Rebuilding a period chimney
We’ve tried to cover as much about rebuilding a period chimney as possible in our main video without labourimg the point. The two videos below are very interesting and it’s fascinating to watch professionals working with lead.
The first video shows how the DPC (damp proof course) is made from a high-quality sheet of lead.
This video shows how the lead step flashing is beaten and formed into shape.
Anatomy of a chimney
Based on the video, here are the key elements of a chimney.
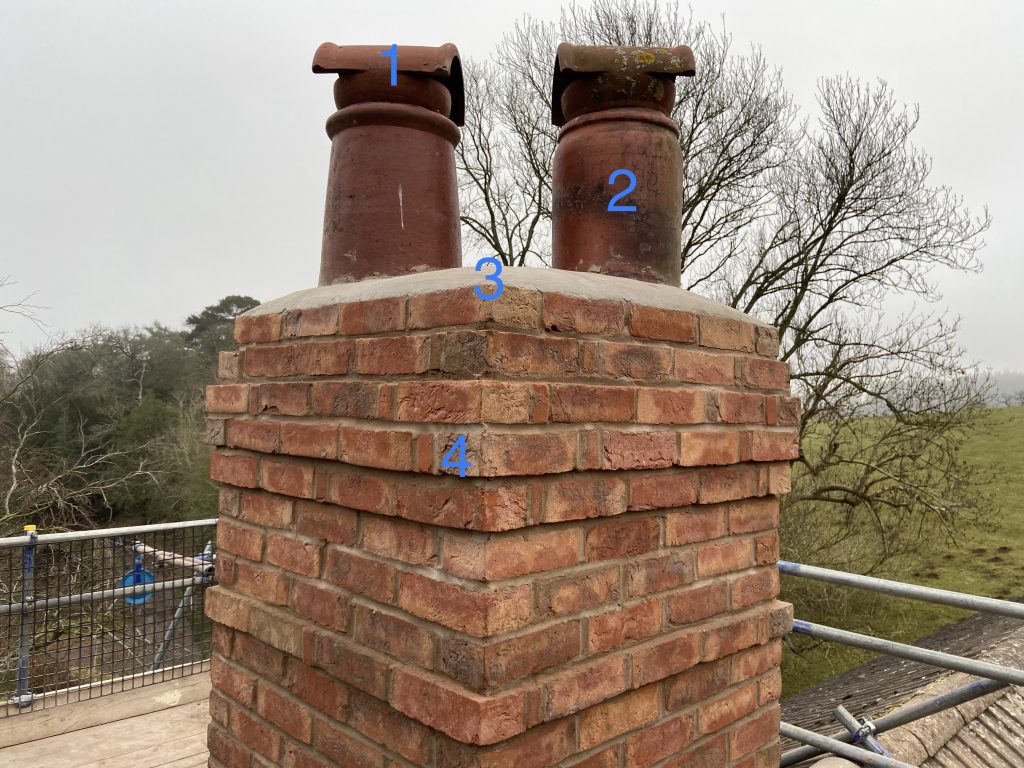
- Cowl: prevents smoke from blowing back down the chimney, and prevents birds from nesting in your flue. They also act as rain guards.
- Pot: their main purpose is to disperse smoke and improve draw.
- Flaunching: mortar that holds the pots in place. It also prevents rain from getting into the stack and into your house.
- Corbelling: staggering brick courses at the top of the chimney stack. The purpose in most cases is to make the stack more interesting from a visual perspective.
Step flashing: from our experience, flashing is one of the most important things to get right on a chimney, as this is where our leaks were coming from. The importance of flashing cannot be overstated.
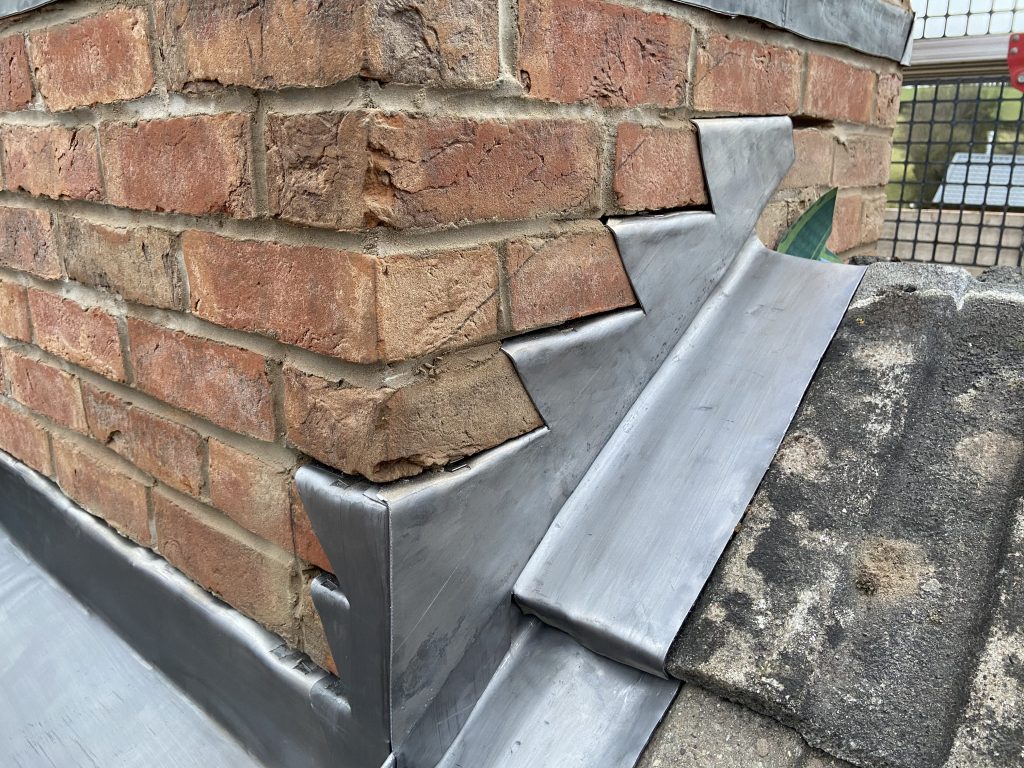
Flashing essentially seals the space between your roof and chimney. It keeps out rain, but is equally vital to keep melting snow water from making its way into the house.
This is why we insisted on getting experienced workmen to work on our flashing, and to make sure it was watertight.
DPC (damp proof course): this is made from high quality lead and is designed to prevent water ingress into the house via the chimney stack.
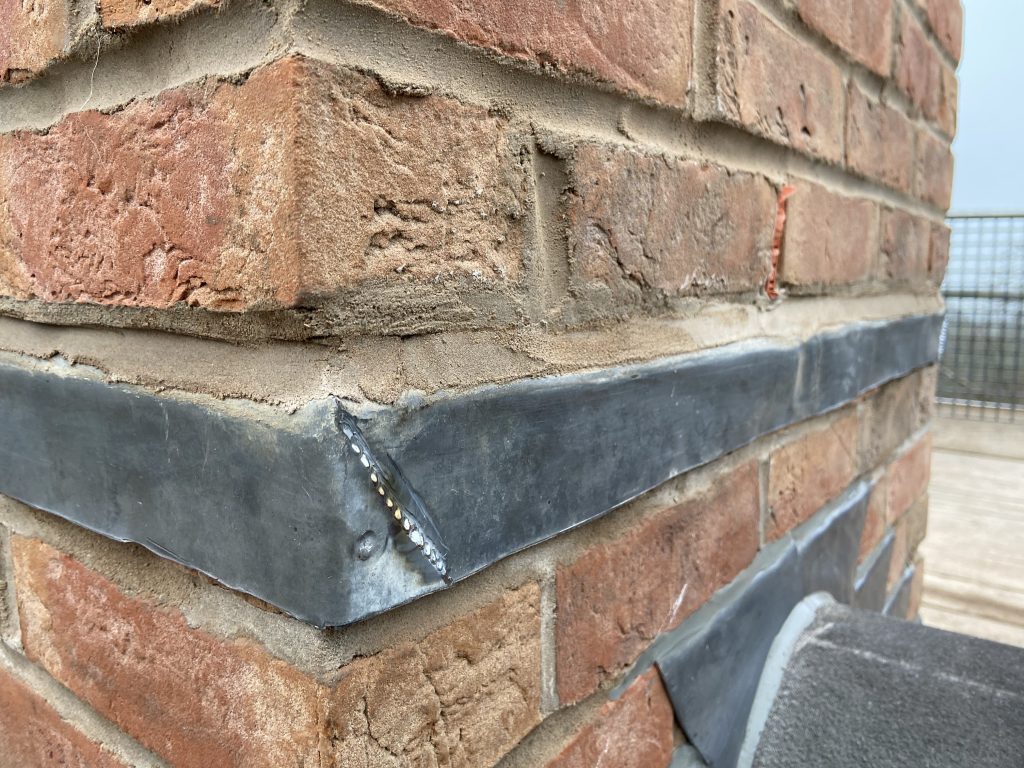
It’s fitted during the chimney rebuild (above the ridge line in our case) and acts as a barrier from water that has seeped through the bricks. Bricks are porous and can take on a lot of water, especially during sustained, heavy rainfall, so the DPC is there to prevent this water from getting into the house.
Image gallery: old chimney


Image gallery: new chimney rebuilt in a heritage Victorian style


In closing, it took us five full days to complete this project. One day to take down the old chimney, two days to rebuild it, and two days for the lead work (flashing and DPC tray).
This excluded the 4-5 hours it took to put up the scaffolding which was done well before the work commenced.
I hope this gives you a good insight into rebuilding a period chimney, utilizing modern day techniques and materials. If you have any questions or feedback, please leave a comment below.